Followers

11/11/09

Chicken soup for the soul... Not! Chicken soup for the stomach!

Soups were a very important meal during my childhood. Whenever I was sick with a cold, my mom game me chicken soup to eat. There was a period of time in my childhood when I was very weak and I always got sick. My mom prepared soups rich in iron and vitamins that would help me get strong. Like most children in my family, I grew up loving soups, or caldos, as we called them.

This is a chicken caldo made with a Mexican twist. I love it because I prepare it with vegetables from my own back yard.

Chicken Caldo with Vegetables and Pasilla Peppers

2 Tablespoons of olive oil
1 small onion, finely chopped
2 garlic clove, minced
6 cups of water
2 chicken breasts, cleaned
2 sprigs of thyme, finely chopped
Salt to taste
2 pasilla peppers, seeded and deveined
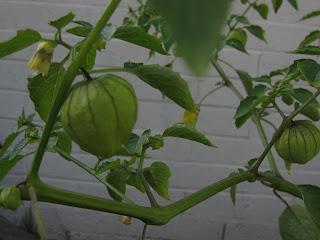
10-15 tomatillos milpero (I like the very small and purple in color), cleaned and halved.
3 small carrots, chopped
3-4 small zucchinis or summer squash, chopped
3 small potatoes, peeled and quartered

In a medium pot over slow fire, heat the oil. Add onion and garlic and sauté until translucent. Add the chicken, water, salt and thyme. Bring to a boil, reduce to simmer and cook for about 20 minutes . While the chicken cooks, soak the peppers in boiling water for 10 minutes. When soft, place in a blender with tthe tomatillos and a little bit of the soaking water and purée to make a sauce. Pass the sauce through a fine strainer to separate the solids and set aside.  When the chicken is tender, remove from the pot and set aside to cool for a few minutes.  Add the carrots and potatoes to the pot. Cook until vegetables become fork tender. Shred chicken and return to the pot. Add the zucchinis and pasilla sauce. If needed, correct the seasoning and simmer until the chicken and all the vegetables are cook thoroughly. Serve hot.


This other soup is really good. I learned how to make this soup from one of Giada De Laurentiis' cook books. This is a pea and sweet basil soup but I have made it with cilantro and with lemon basil and it tastes very good, too. I like to change, add or delete some of the ingredients to my taste. My changes are in italic.

Peas and Basil Soup

2 tablespoons olive oil
1 tablespoon butter (I do not use butter)
1 small onion, diced
1 clove garlic, minced
1 teaspoon of dried red pepper flakes (optional)
1 teaspoon salt
1/2 teaspoon freshly ground black pepper 
1 1/2 pounds (about 4 1/2 cups) frozen peas
3/4 cup chopped fresh basil leaves 
2 cups chicken broth, divided (vegetable broth)
2 cups cream (3/4 cup of cream)
4 to 6 very thin slices fresh mozzarella cheese (I haven't used cheese)
1/4 cup diced roasted red bell peppers (I haven't used peppers)

Place a medium soup pot over medium heat. Add the olive oil, butter (if using), onions, garlic, salt and pepper. Cook until the onions are soft and translucent, about 5 minutes. If using, add the pepper flakes and cook a few seconds longer. Add the peas and basil and heat until the peas are thawed (I do not add the basil at this point)Place the pea (here is where I add the basil) mixture in a blender. Add 1 cup of the broth and pulse until pureed, adding more broth, if necessary, to puree. Return the pureed mixture to the pot. Stir in the remaining broth and cream. Return the pan to medium heat and cook until hot, but not boiling.
To serve, place the soup in bowls. If using, float a thin slice of fresh mozzarella cheese on top of each soup and sprinkle with the diced roasted red bell peppers. Serve immediately.

Soups could be good for the soul but they also warm the heart and heal the body. I love them!

11/7/09

Corn Masa for Tortillas


When we lived in Tijuana, we observed many Mexican traditions like The Day of the Dead, which just happened a few days ago.  We have lost many of our traditions since we moved to the United States, but luckily, we have kept the ones that have to do with food. For example, we always get together to make tamales for Christmas, we always cut Rosca de Reyes in January; we eat seafood every Wednesday and Friday during Lent; and my mom makes a bread pudding called Capirotada for Good Friday. We continue to eat tortillas as part of our main diet.


I try to maintain as many of our Mexican traditions as possible. While it is not easy living outside of Mexico, it is very important for me because I believe traditions are what have kept my family together...well, traditions and good food. 


Although I can buy very good tortillas at the market, once in a while I like to make my own tortillas but I either make the masa from a corn flour or buy it already made from the local tortilleria or tortilla factory. Making corn masa for tortillas from scratch is an ancient art. It requires several steps and, for better results, a couple of days of preparation. A few weeks ago, I tried my hands in this art form for the first time and I can't even describe how amazingly flavorful the results were!


The first step is to make nixtamal:

Start with dried corn. Rinse and clean the dried corn to take out any chaffs from the corn husks and any rotten grains. Dissolve 1 tablespoon of powdered lime in 1/2 cup of water for every 1 pound of corn. In a non reactive pot, cook the corn over a slow fire with the  dissolved lime and 4 cups of water for every 1 pound of corn. Warm it up slowly until it comes to a low boil. Cook for about 25 minutes, stirring every few minutes with a wooden spoon. To know when the corn is ready, take a grain and rub it with your fingers, if it peels easily, it is ready. Then remove the pot from the fire, cover and allow to rest overnight in a cool place on the counter.


The next day, drain the liquid (called nejayote) and rinse the corn one or two times until the water comes out clean. Slightly rub the corn between your fingers to get rid of some of the loose peeling. The corn is now called nixtamal, it  is ready to be ground and become masa.

The second step is to make masa:
You can grind the nixtamal in the ancient Metate, or in a hand-mill or you can use a modern food processor. This time I used the hand-mill but it was a lot of work. I think a food processor can do the job just as well and it'll be easier. Place the nixtamal in the mill a little bit at a time and grind two or three times until it's all ground and soft. After the first pass add water as needed, a teaspoon at a time. This has now become masa and after a little kneading, it will be ready for tortillas.


The third step is to make tortillas:
Lay a sheet of plastic wrap (a cut up plastic bag works well) over base of tortilla press, draping it over the sides. Rub a little bit of water on your hands, grab a lump of masa the size of a golf ball. Place the ball of masa on the plastic. Lay another sheet of plastic wrap over the masa, draping it over the sides, then close the press to flatten masa into a tortilla. Hold the pressed tortilla with the plastic on both sides in one hand. Peel away the top plastic from the tortilla (not the tortilla from the plastic). Flip it over into your other hand, and peel away the other piece of plastic. Gently place the tortilla on a hot skillet or griddle. 


If your tortillas are not perfect circles, don't worry; they will still taste wonderful. Cook the tortilla for a couple of minutes on each side. Remove from the griddle and wrap in a kitchen towel to keep warm. Repeat the process until all the masa has been used. 


Enjoy your tortillas with your favorite Mexican food. 


You can make the masa and freeze it for future use.

This seems like a lot of work but I guarantee you, the tortillas taste so great, it'll be worth it!


11/1/09

The Day of the Dead / Día de los Muertos


The Visit 
(By Luis G. Urbina)

It has to come. It will come. 
When? ... I do not know. Very soon. 
I hear its voice in the distance 
and I hear its footsteps. 

Open the door, my soul, so it doesn't have to call. And have everything ready; 
turn off the stove, clean the house 
and the white faith candle, in the back. 

It has to come. It will come. Quietly 
will take me in its arms. Just as the mother
takes her child when he returns, tired of running through the forest and jumping in the streams. 

I will tell it quietly ... "Welcome",
and without fear or surprise, 
I will surrender to the Mystery, 
I will think of God and close my eyes. 


I have never been scared of the dead. I have always treated death with a special kind of reverence and respect but I also associate the dead with fun and happy spirits.  In México, we make friends with the dead and we have a special day  in which we invite our loved ones that have left this world to come back and have fun with us. 

On November 1st and 2nd,  Mexicans celebrate El Día de los Muertos or The Day of the Dead. People visit the cemeteries to be with their loved ones and it is customary to build altars for the dead. I have been putting up an altar every year for my dad but last year, I added two more people to my altar - Mary (Richard's sister) and Rafa (my nephew).


This is my altar

These are pictures of the Altar de Muertos at The Sherman Heights Neighborhood Cultural Council.   (click on the pictures to see an enlargement)


10/10/09

Berry-delicious


Rich loves strawberries. He likes to buy these at the farmer's market to make strawberry jams or toppings for his ice-cream and sandwiches and sometimes we make strawberry syrup to put over pancakes.

Berries don't last long. You have to prepare your jam or topping right away or you have to eat the berries very shortly after you buy them; they will spoil overnight. Rich discovered a way to extend the life of his berries and has been using this method.  This week he bought a huge amount of strawberries but forgot to follow his method and some of the berries got moldy by the following morning. I decided to make a desert with the ones that were still good. I prepared an adaptation of a recipe I found in my Bon Appétit book. I did not have all the ingredients to follow the exact recipe but I added and substituted with what I had on hand - it turned out berry-delicious.
Strawberry-Chocolate Tart with Nutty Crust 


Crust:
1 1/2  C. mixed almonds and pecans, toasted (original called for 2 C. of pecans)
1/4 C. ground graham crackers (this was my addition)
6 T. light brown sugar
1/4 C. (1/2 stick) unsalted butter, melted

Preheat oven to 325°F. Combine nuts, crackers and sugar in a food processor. Blend until nuts are finely ground. Add butter and process until it forms into a moist dough. Press dough over bottom and up sides of tart pan with removable bottom. Bake crust until golden brown and firm to the touch, about 30 minutes. Transfer to a rack to cool completely in pan.

Filling:
3/4 C. half and half (original called for whipping cream)
6 oz. bittersweet or semisweet chocolate, chopped

In a heavy bottom saucepan, bring half and half to a simmer. Remove from heat and add chocolate. Stir until melted and smooth. Pour mixture into crust and chill until chocolate is set, about 1 hour.

Topping:
1 Pint fresh strawberries, clean and sliced (original called for raspberries)
2-3 T. seedless strawberry jam (original called for 1/4 C. raspberry jam)
The juice of 1/2 lemon (this was my addition)

Arrange strawberries on top of tart. Stir jam and lemon juice in a heavy small saucepan over low heat until melted. Brush melted jam over strawberries. Remove tart from pan and serve cold.

10/4/09

My Edible Garden

Fruit and Leaves

Pomegranate


Fennel

Papaya Leaves

Lemon


Verdolagas

More Fennel


Herbs

Sage and Bay-leaf

Lemon Verbena

Garlic Chives

Basil

Oregano

Sage, Thyme and Chamomile

Curly Parsley

More Sage

Zucchini and Summer Squash

Flor de Calabaza

Butternut Squash
Courgettes
Marrows


Root Vegetables

Potato and Beet leaves
Beet Roots
Meñique

Sweet Potatoes

Tomatoes

San Marzano

Cherry Tomatoes

Tomatillo
Tomatoes and Peppers

Garden Visitors
Dragonfly

Green Bug
Butterfly